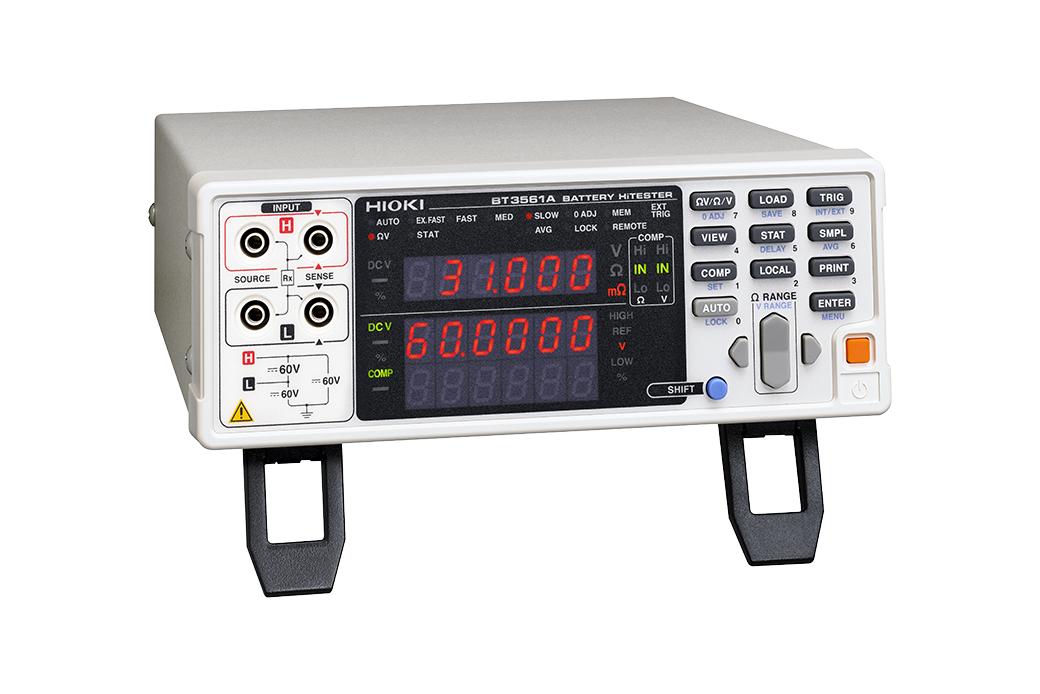
HIOKI BT3561A BATTERY HiTESTER
Fully automated production line testing of small cells for power motors or small packs of up to 60 V
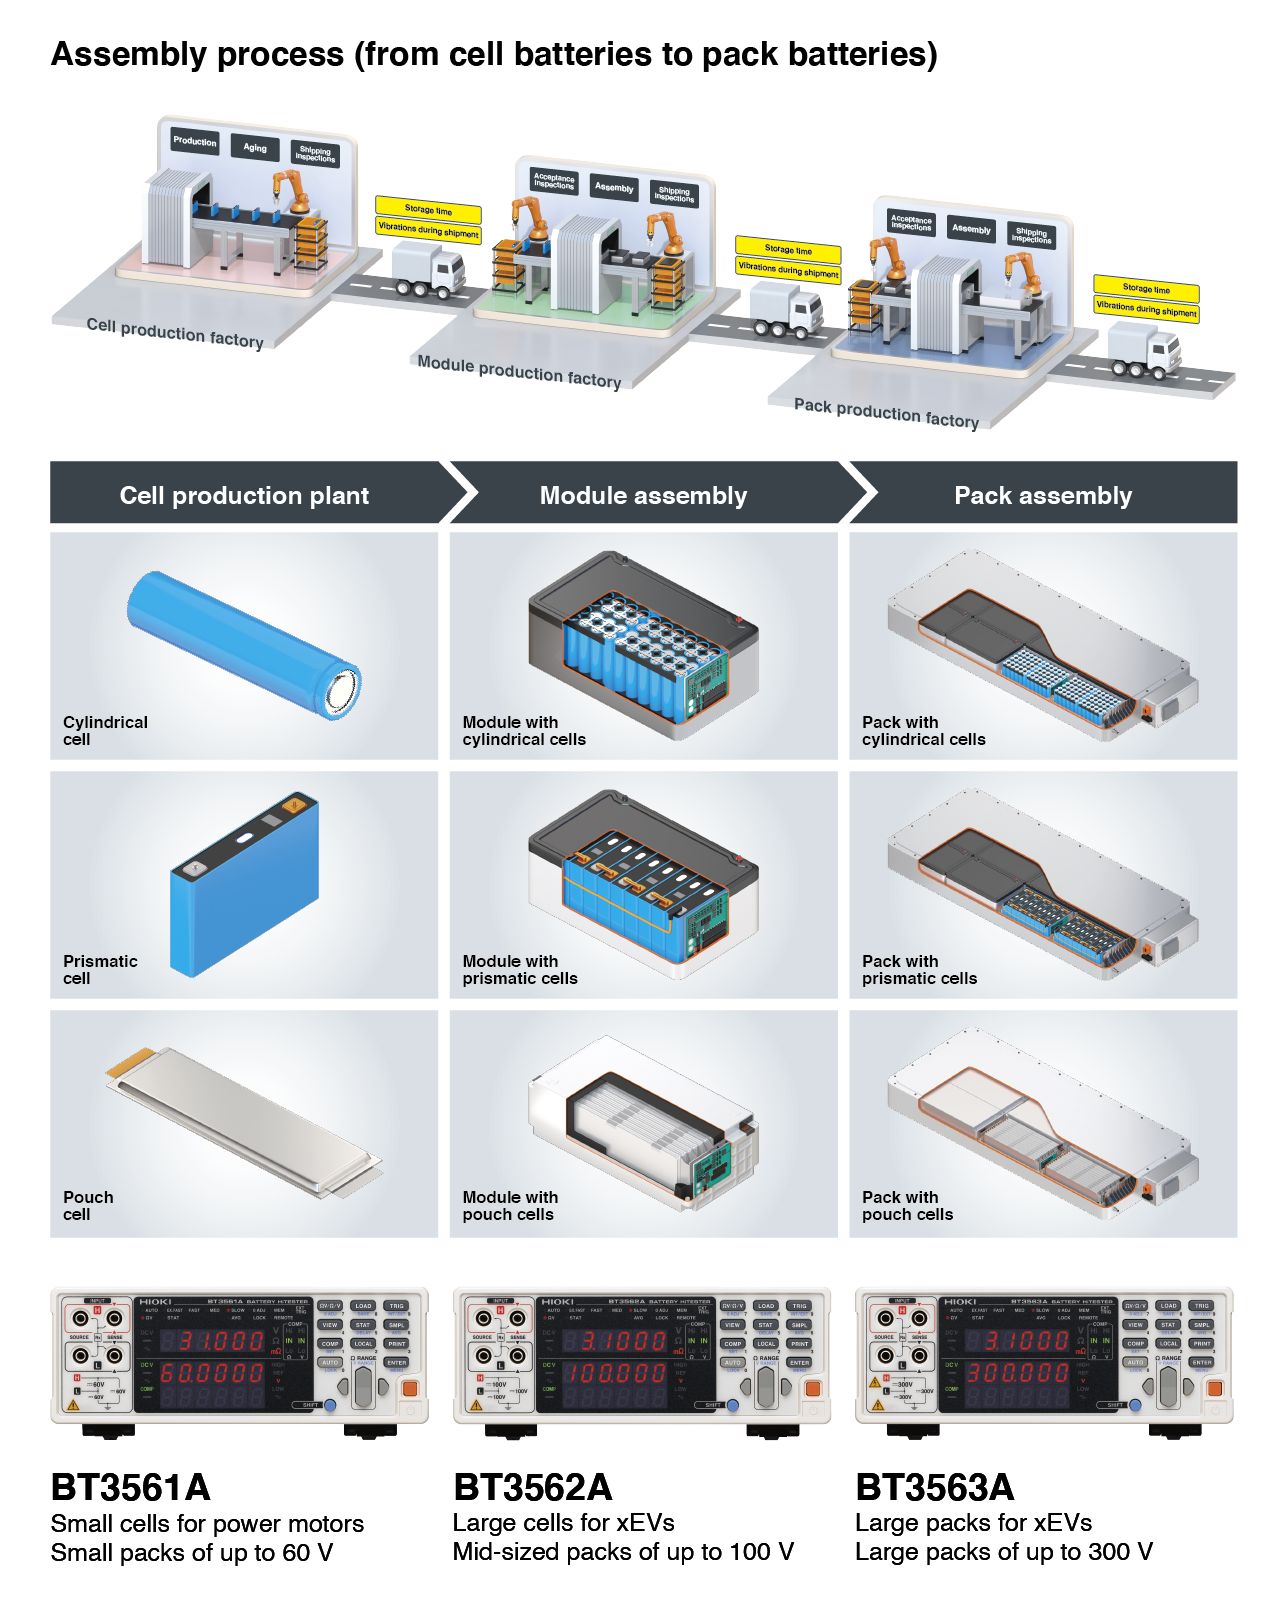
Inspect the quality of completed cells, modules, and packs on production lines. Measure internal resistance (AC-IR) and open-circuit voltage (OCV) to check battery quality. Cells produced at the cell production factory are shipped to the module production factory after undergoing a shipping inspection. Since factors such as vibrations during shipment and even the passage of time can cause defects, batteries undergo an acceptance inspection before being assembled into modules and packs.
BT3561A
Small cells for power motors, Small packs of up to 60 V
Voltage measurement ranges: 6 V/60 V
Resistance measurement ranges: 30 mΩ/300 mΩ/3 Ω/30 Ω/300 Ω/3 kΩ
BT3562A
Large cells for xEVs, Mid-sized packs of up to 100 V
Voltage measurement ranges: 6 V/60 V/100 V
Resistance measurement ranges: 3 mΩ/30 mΩ/300 mΩ/3 Ω/30 Ω/300 Ω/3 kΩ
BT3563A
Large packs for xEVs, Large packs of up to 300 V
Voltage measurement ranges: 6 V/60 V/300 V
Resistance measurement ranges: 3 mΩ/30 mΩ/300 mΩ/3 Ω/30 Ω/300 Ω/3 kΩ
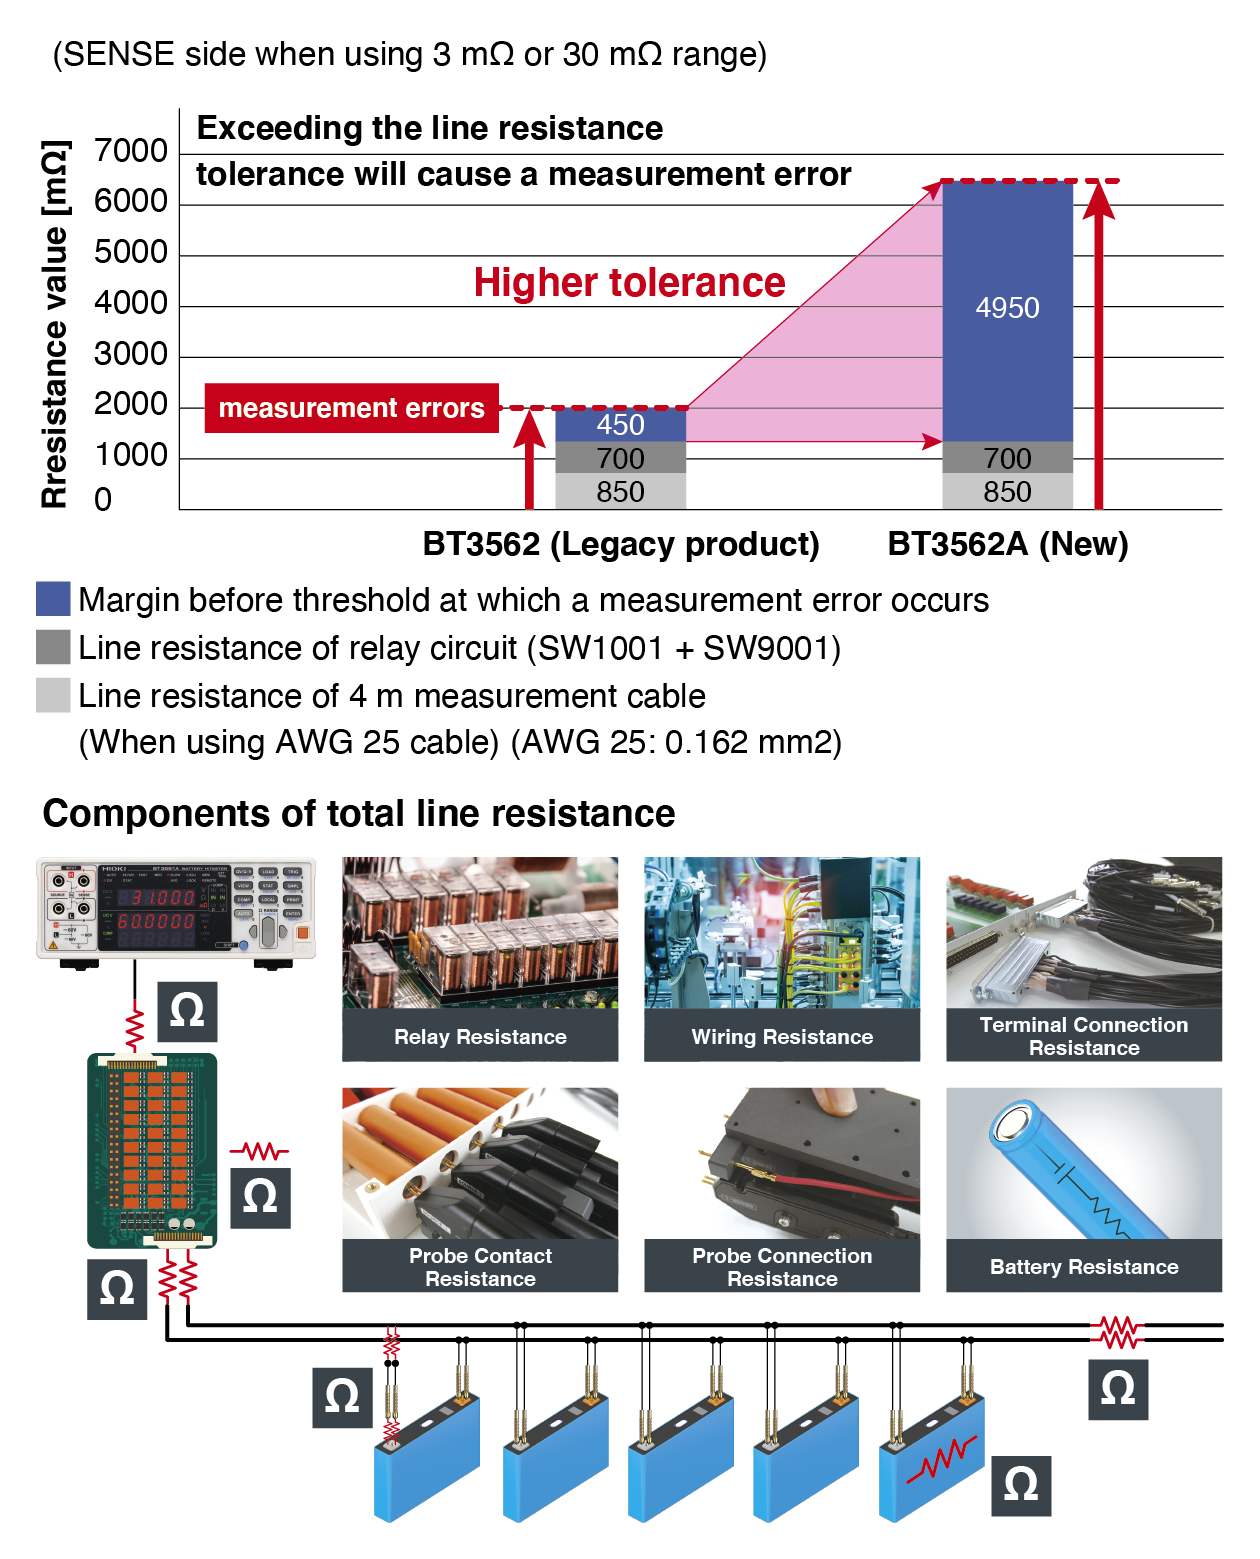
The new BT356xA has dramatically improved tolerances for line resistance compared to previous models. This improvement makes it easy to build test systems with large numbers of channels using relays. Additionally, a longer maintenance cycle for systems in use means fewer maintenance man-hours. Finally, its capability to handle thinner cables than with previous models* makes it easier to route cables.
*AWG 29 (0.064 mm2) wire equivalent to 2.2 Ω over
an 8 m round trip can be used with the 3 mΩ or 30 mΩ range.
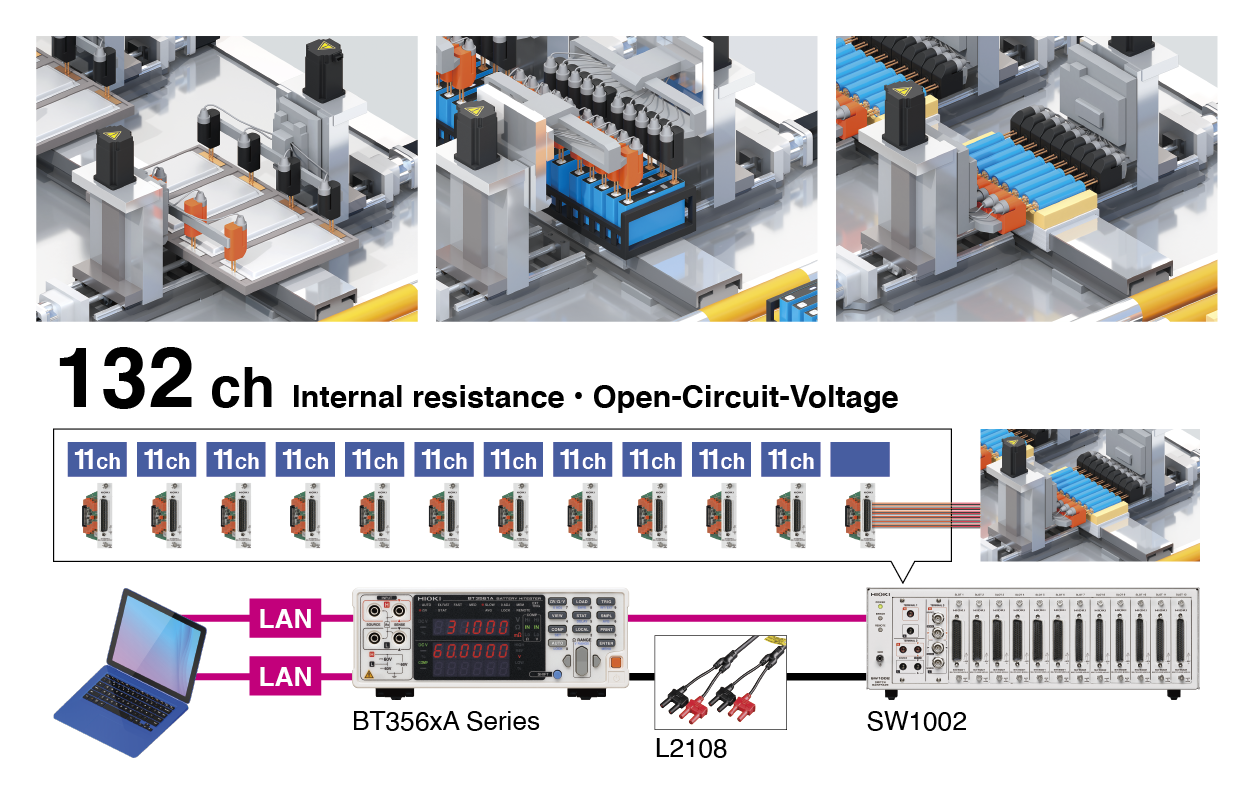
You can use the Switch Mainframe SW1001/SW1002 to increase the number of measurement channels. Additionally, you can perform scan measurement by controlling two instruments at once, for example a BT356xA series instrument and a DM7276, or a BT4560 and a DM7276.
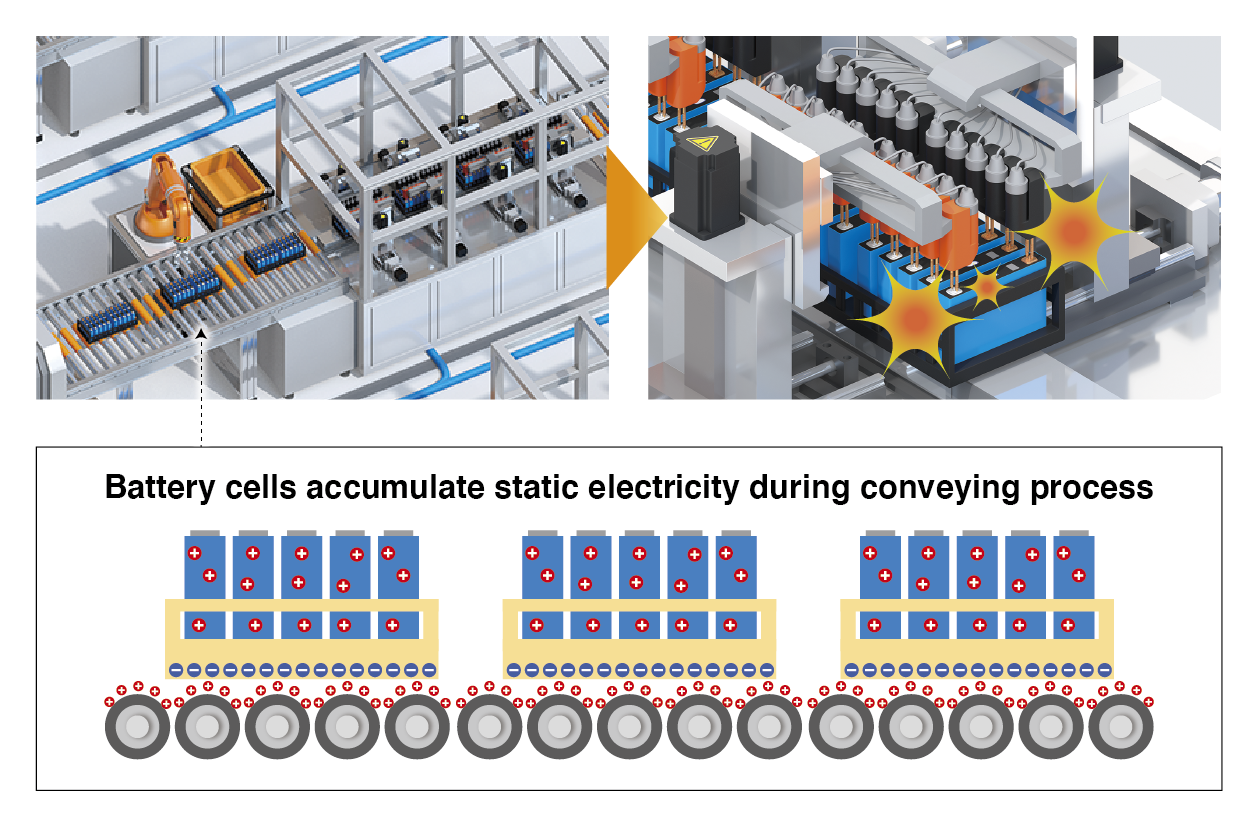
Batteries can become charged on production lines, for example, when being transported on a conveyor belt. When probes are placed in contact with such batteries, the resulting application of static electricity can then damage the instrument. The BT356xA series is designed to withstand contact with ±30 kV of static electricity*, preventing static-caused malfunctions and reducing testing line downtime.
* ±30 kV IEC 61000-4-2 contact discharge
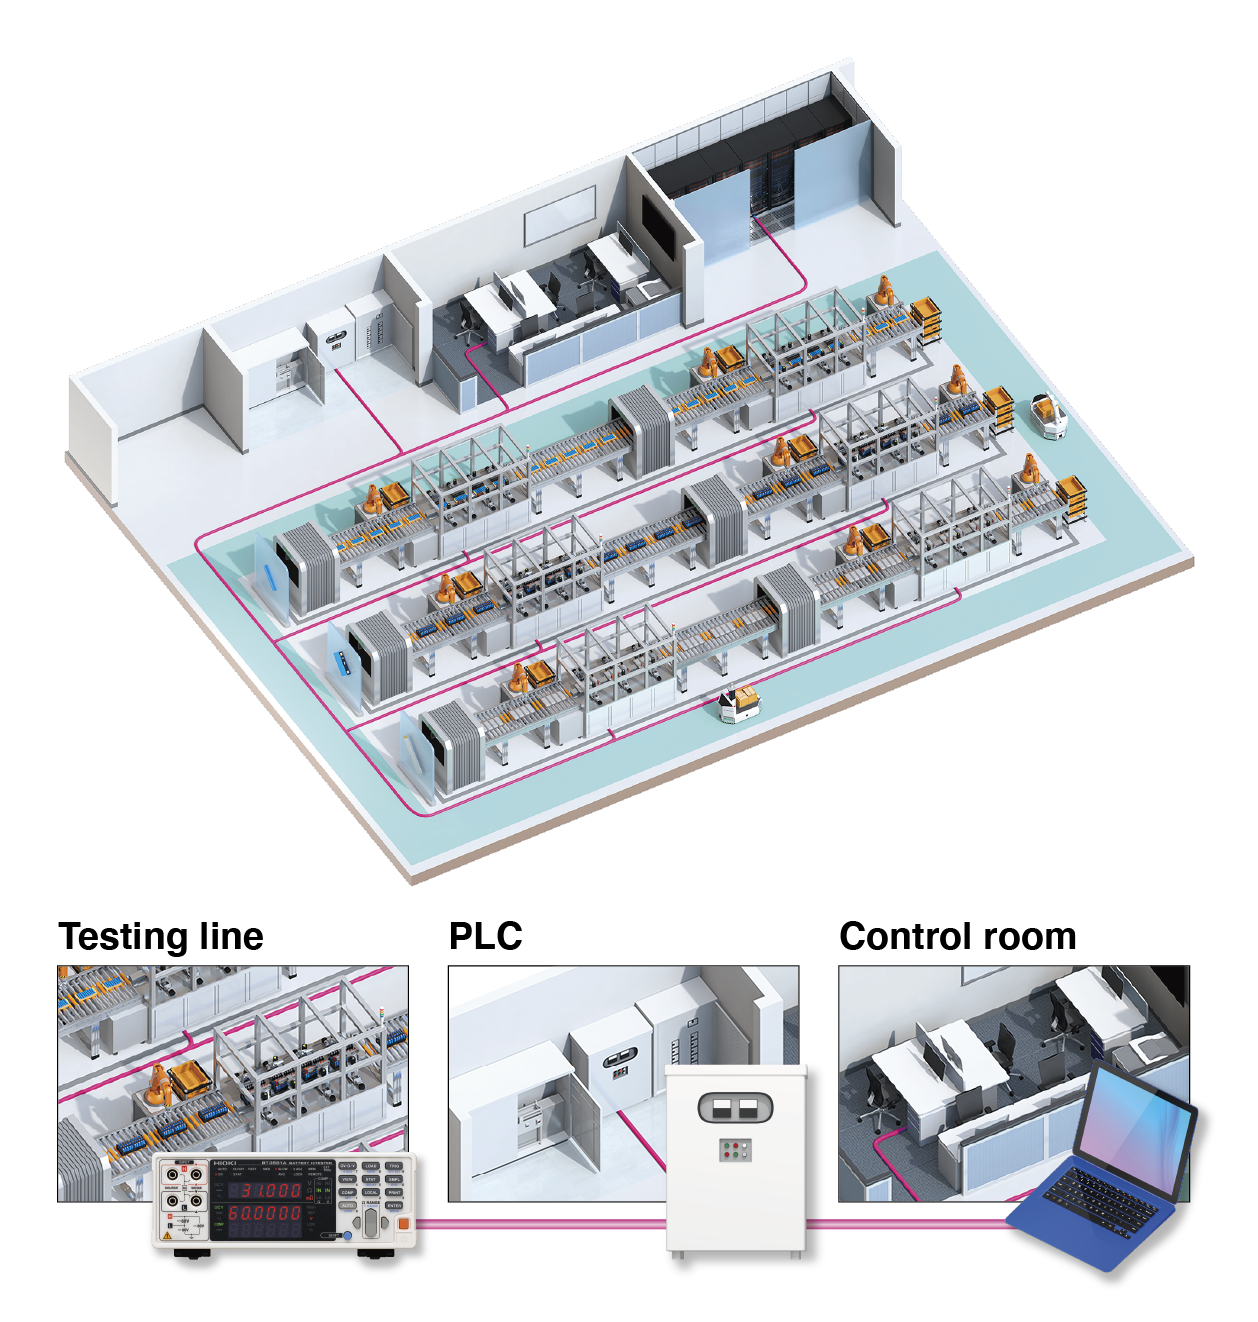
The BT356xA series is equipped with a LAN interface as standard equipment, making it easy for the instrument to interoperate with a PLC*-based control system. The ability to use readily accessible LAN cables helps lower costs during system development and maintenance. Furthermore, a design with strong noise and static electricity resistance helps avoid system problems.
*Programmable Logic Controller, a device that automatically controls one or more machines
| Resistance measurement ranges | 30 mΩ(Max. display: 31.000 mΩ, resolution: 1 μΩ, measurement current: 100 mA) 300 mΩ(Max. display: 310.00 mΩ, resolution: 10 μΩ, measurement current: 10 mA) 3 Ω(Max. display: 3.1000 Ω, resolution: 100 μΩ, measurement current: 1 mA) 30 Ω(Max. display: 31.000 Ω, resolution: 1 mΩ, measurement current: 100 μA) 300 Ω(Max. display: 310.00 Ω, resolution: 10 mΩ, measurement current: 10 μA) 3 kΩ(Max. display: 3.1000 kΩ, resolution: 100 mΩ, measurement current: 10 μA) Basic accuracy: ±0.5% rdg ±5 dgt(30 mΩ range or more) Measurement frequency: 1 kHz ±0.2 Hz Measurement method: AC four-terminal method |
|||||
|---|---|---|---|---|---|---|
| Voltage measurement ranges | 6 V(Max. display: 6.00000 V, resolution: 10 μV) 60 V(Max. display: 60.0000 V, resolution: 100 μV) Basic accuracy: ±0.01% rdg. ±3 dgt. |
|||||
| Response time | 10 ms | |||||
| Sampling period | Ω or V (60 Hz): 4 ms (EX.FAST), 12 ms (FAST), 35 ms (MEDIUM), 150 ms (SLOW) ΩV (60 Hz): 8 ms (EX.FAST), 24 ms (FAST), 70 ms (MEDIUM), 253 ms (SLOW) Ω or V (50 Hz): 4 ms (EX.FAST), 12 ms (FAST), 42 ms (MEDIUM), 157 ms (SLOW) ΩV (50 Hz): 8 ms (EX.FAST), 24 ms (FAST), 84 ms (MEDIUM), 259 ms (SLOW) |
|||||
| Functions | Contact check, Zero adjustment (±1000 counts), Pulse measurement, Comparator (Hi/ IN/ Lo), Statistical calculations (Max. 30,000), Delay, Average, Panel saving/loading, Memory storage, LabVIEW® driver | |||||
| Interfaces | LAN (TCP/IP, 10BASE-T/100BASE-TX) RS-232C (Max. 38.4 kbps, Available as printer I/F) EXT I/O (37-pin Handler interface) Analog output (DC 0 V to 3.1 V) |
|||||
| Power supply | 100 to 240 V AC, 50 Hz/60 Hz, 35 VA max. | |||||
| Dimensions and mass | 215 mm (8.46 in) W × 80 mm (3.15 in) H × 295 mm (11.61 in) D, 2.4 kg (84.7 oz) | |||||
| Included accessories | Instruction manual ×1, Power cord ×1, Operating Precautions ×1 | |||||
 Malaysia