High-end model in the SURFCOM TOUCH series with an electric column offering high accuracy and size variation
Equipped with a high performing pickup having high resolution and wide range.
It offers high flexibility where granite base size, column height, and X-axis drive range can be selected depending on needs.
.png)


Extended Z-axis measurement range from 800 to 1,000 μm (25% increase)
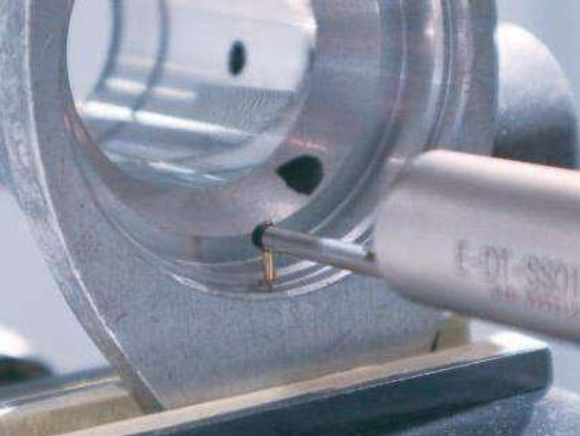
The high performing pickup with a measurement range of 1,000 μm and a z-axis minimum resolution of 0,0001 μm allows for wide-range and high resolution skidless measurement. No need to consider measurement range. In addition to flat surface, the roughness or waviness on undulating surface such as stepped or round surface can be evaluated with one trace. Leveling and zeroing before measurement can also be performed easily.
Size variations for various types of workpieces
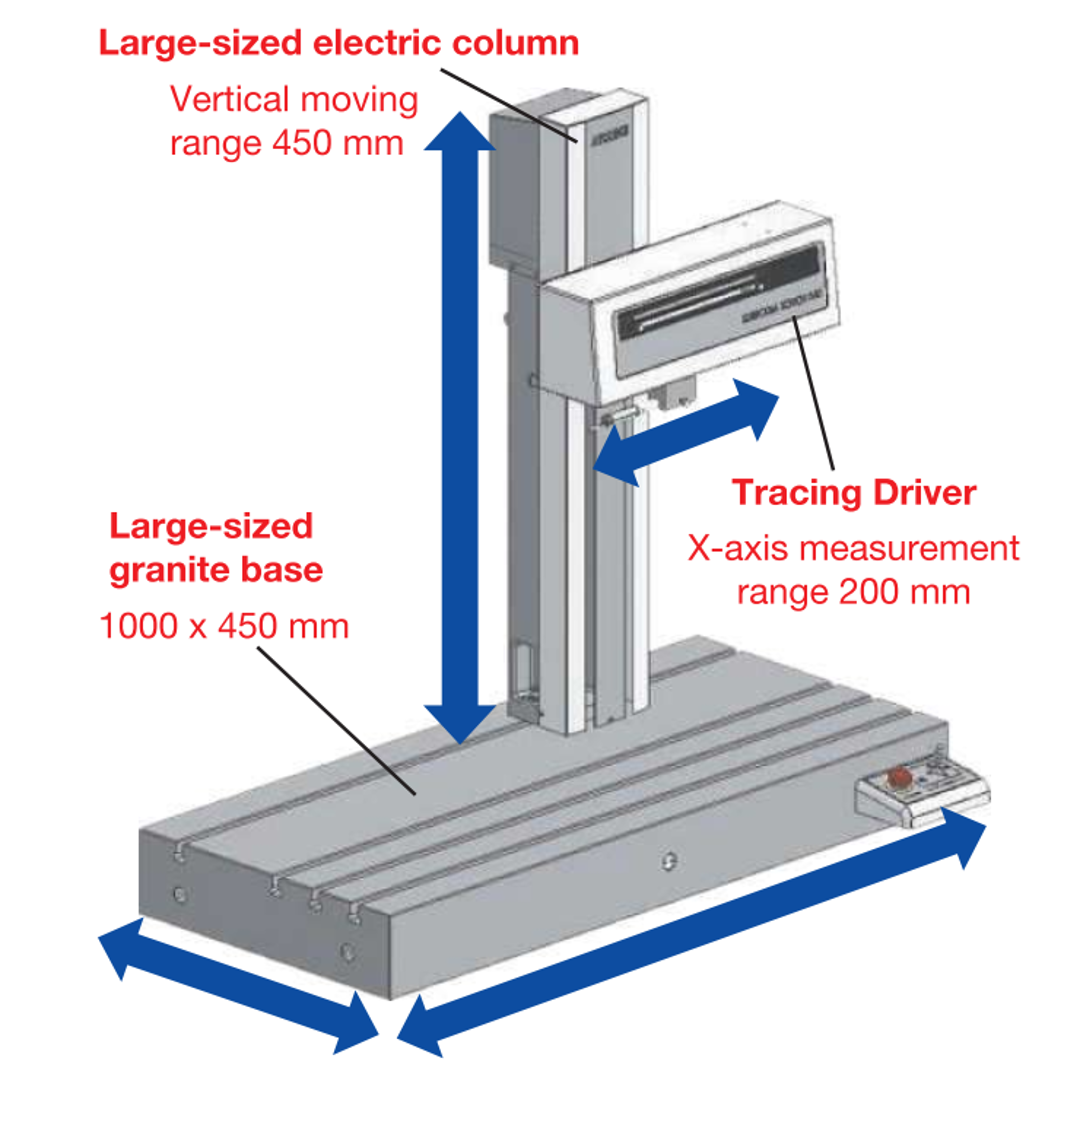
SURFCOM TOUCH 550 allows users to select a combination of the size of the granite base, the height and type of the column and the drive range in the X axis direction.
This meets diverse customer needs such as “we want to reduce the installation space”, “we want to reduce initial costs” , “we want to measure high workpieces” and “we want to measure large flat workpieces”.

.png)
Easy-to-Use Screen
An amplifier with a 7-inch wide touch panel and easy-to-use new interface provides higher operability.
Easy-to-use operation eliminates the need of instructions.
Multi-language support available worldwide
20 Asian and European languages including Japanese, English and German are provided as standard. Language can be easily changed with one touch.
.png)
.png)
USB/micro USB ports as standard equipment
15 measurement conditions and 20 measurement results can be stored in the SURFCOM TOUCH amplifier.
More conditions and results can be stored by connecting a USB memory to the standard USB port.
The amplifier is also equipped with a micro USB port. Measurement data can be transferred to the computer when connected with a USB cable, and a simple inspection report can be created using attached SupportWare II.
Measurement results can be printed quickly
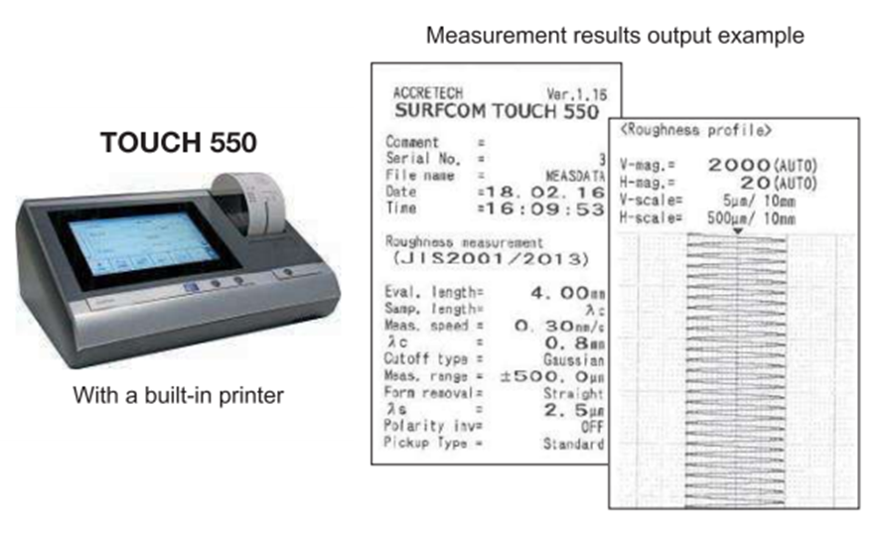
The dedicated printer allows for quick printing of measurement results.
Of course, any measurement data saved in the amplifier or USB memory can be output.

| Model | SURFCOM TOUCH | |||||||||
| 550 | ||||||||||
| -11 | -12 | -13 | -14 | -21 | -22 | -23 | -24 | |||
| Measurement range | Z direction | ±500 µm | ||||||||
| X direction | 100 mm | 200 mm | ||||||||
| Tracing Driver | Drive distance | 100 mm | 200 mm | |||||||
| Straightness accuracy | (0.05 + 1.5L/1000) µm (L: measurement length (mm)) | |||||||||
| Speed | Measurement Speed | 0.03, 0.06, 0.15, 0.3, 0.6, 1.5, 3, 6 / 0.05, 0.1, 0.2, 0.5, 1, 2, 5 mm/s (switching) | ||||||||
| Moving speed | to 3 mm/s (when operating the amplification indication section), to 6 mm/s (when using the joystick) | |||||||||
| Pickup | Sensing type | Differential inductance | ||||||||
| Measurement Method | Skidless/Skid (optional) | |||||||||
| Z direction resolution | 0.0001 µm/±40 µm, 0.00125 µm/±500 µm | |||||||||
| Stylus (standard accessory) |
Model | DM43801 | ||||||||
| Measurement force | 0.75 mN | |||||||||
| Radius | rtip = 2 µm | |||||||||
| Angle | 60°cone | |||||||||
| Material | Diamond | |||||||||
| Measurement stand | Column | Drive distance | 250 mm | 450 mm | 250 mm | 450 mm | ||||
| Moving speed | — (Manual) | to 3 mm/s (when operating the amplification indication section), to 10 mm/s (when using the joystick) |
— (Manual) | to 3 mm/s (when operating the amplification indication section) to 10 mm/s (when using the joystick) , | ||||||
| Base | Size | 600 mm x 317 mm | 1000 mm x 450 mm | 600 mm x 317 mm | 1000 mm x 450 mm | |||||
| Material | Granite | |||||||||
| Maximum allowable load weight*1 | Approx. 48 kg | Approx. 42 kg | Approx. 33 kg | Approx. 48 kg | Approx. 43 kg | Approx. 37 kg | Approx. 28 kg | Approx. 43 kg | ||
| Analysis item | Calculation Standards | Comply with JIS2013/2001, JIS1994, JIS1982, ISO1997/2009, ISO13565, DIN1990, ASME2002/2009, ASME1995, CNOMO | ||||||||
| Parameter | Profile Curve | Pa, Pq, Pp, Pv, Pc, PSm, PΔq, PPc, Psk, Pku, Pt, Pmr(c), Pmr, Pδc, Rz82, TILTA, AVH, Hmax, Hmin, AREA, Rmax, Rz, Sm, Δa, Δq, λa, λq, Lr, Rsk, Rku, Rk, Rpk, Rvk, Mr1, Mr2, Vo, K, tp, tp2, Hp |
||||||||
| Roughness Curve | Ra, Rq, Rz, Rv, Rc, Rt, RSm, RΔq, Rsk, Rku, Rmr(c), Rmr, Rδc, Rz94, R3z, RΔa, Rλa, Rλq, Ry, Lr, Sm, S, tp, tp2, PC, RPc JIS, RPc ISO, RPc EN, Pc, PPI, Rp, Rmax, Rz.I, RS, Rmr2, Mr1, Mr2, Rpk, Rvk, Rk, Vo, K, A1, A2, Rpm, Δa, Δq, Htp |
|||||||||
| Waviness Profile Curve |
Wa, Wq, Wt, Wp, Wv, WSm, WPc, Wsk, Wmr(c), Wmr, Wδc, Wz, Wc, Wku, WΔq, WEM, WEA, WE-a, WE-q, WE-p, WE-v, WE-Sm, WEC-q, WEC-m, WEC-p, WEC-v, WEC- |
|||||||||
| Motif | R, Rx, AR, W, Wx, AW, Rke, Rpke, Rvke, NCRX, NR, CPM, SR, SAR, Wte, NW, SAW, SW, Mr1e, Mr2e, Vo, K | |||||||||
| Evaluation curve | Profile Curve, Roughness Curve, Filtered Waviness Curve, Waviness Profile Curve, ISO13565 Special Roughness Curve, Roughness motif curve, Waviness motif curve, Upper envelope waviness curve, Rolling Circle Waviness Curve |
|||||||||
| Characteristics graph | Abbot curve, Amplitude density function, Power graph | |||||||||
| Filter | Filter Type | Gaussian, 2RC (phase compensation), 2RC (non-phase compensation) | ||||||||
| Cutoff Value | λc | 0.08, 0.25, 0.8, 2.5, 8, 25 mm | ||||||||
| λs | None, 2.5, 8, 25 µm | |||||||||
| Amplification Indicator | Display | 7-inch color liquid crystal touch panel | ||||||||
| Data output | USB connector for USB memory x 1, Micro USB connector for USB communication x 1 | |||||||||
| Print output | Standard function/Thermal recording paper width: 58 mm (recording width: 48 mm) | |||||||||
| Language | Japanese, English, Chinese (Traditional Chinese/Simplified Chinese), Korean, Thai, Malay, Vietnamese, Indonesian, German, French, Italian, Czech, Polish, Hungarian, Turkish, Swedish, Dutch, Spanish, Portuguese | |||||||||
| Specification | Power Supply | Power Supply | AC100 to 240 V ±10%, 50/60 Hz, single phase, D-type grounding | |||||||
| Power Consumption | Maximum 110 VA | |||||||||
| External dimensions (W x D x H)/Weight | Measurement unit: See the external view below. Amplification indicator: 340 x 214.5 x 139.5 mm/about 4.1 kg |
|||||||||
| Standard accessories | Roughness specimen (For Japan: E-MC-S109A, For outside Japan: E-MC-S24D), leveling adjustment table (E-AT-S02A), touch pen (E-MA-S112A), printing paper (E-CH-S25A), instruction manuals, SupportWare II |
|||||||||
*1 This maximum allowable load weight is for the case when using the optional antivibration table (E-VS-S57B for -11, -12, -13, -21, -22, -23 system, and E-VS-R16D for -14, -24 system)
Lebih maklumat tentang MSP Metrology (M) Sdn Bhd Malaysia