Mô tả
 PRODUCT DESCRIPTION
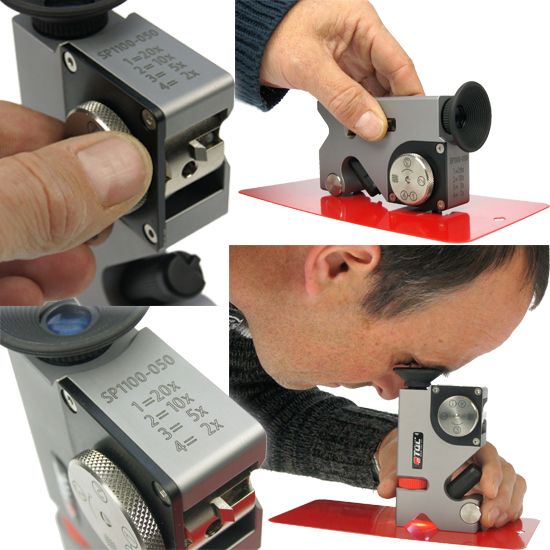
The TQC SP1100 SuperPIG is a destructive precision tool for inspection and thickness measurement on single or multiple coats on virtually all substrates, including wood, plastics, metals etc. Also observes and measures substrate and film defects.
Applies a small incision in the layer of paint, and uses an integrated microscope reticle.
The SPi 100 is a very stable instrument, also the integrated microscope has an excellent focus.
The microscope is provided with a double scale (mm and inch) which allows you to calculate to micrometers and mils.
Reduce of ambient light because of a rubber end cap on the microscope so when observing through the microscope you will have a better focus upon the specimen.
INDUSTRY APPLICATION
Automotive, Coating Industry, Construction/Building maintenance, Galvanize, Laboratory, Paint, Steel Protection, Wholesale Industries
STANDARDS COMPLIED
ISO 2808, ASTM D41 38-07a
FEATURES
- Made of Titanium anodised aluminum
- Three knife sizes and one crosscut knife in one holder
- Ergonomic design: revolving-system to change knives
- Bright white LED lights ensure clear vision through the microscope
- Small size eases use in corners
- Engraved scaling (D-factor) for easy calculations
SCOPE OF SUPPLY
- Super Pig III destructive paint inspection gauge
- Black marker
- Knives 1, 2 and 4 (sp1111, SP1112, SP1116)
- Hex diagonal wrench
- Black leather case with belt clip
TECHNICAL SPECIFICATIONS
Range: 2 to 1800 microns / 0,1 to 70 mils
Microscope: Magnification SOX (with graduation-scale)
Scale range: 0,00 — 1,8 mm / 0,00 — 0,07 inch (rectilinear measured)
Variation: Accuracy depends on chisel cut angle and users reading
Battery: 4 x AGi 31LR44
Material: Titanium anodised aluminium
Dimension: 25mm (Width) x 110mm (Height) x 65mm (Length)
USAGE
-
Mark the inspecting surface with a black line of approximately 20mm.
-
Place the SuperPIG with its cutter behind the line and pull (without putting pressure on the gauge) the SuperPIG across it, just cutting through the coating.
-
Tilt the SuperPiG and place the illuminated area at the intersection of the cut with the black line.
-
Look through the microscope and turn the knob to focus on the inspection area.
-
Read the graduation-scale and multiply the divisions with the D factor engraved on the SuperPiG, depending on pm or mil scale.
SPECIAL CARE
-
Though robust in design, this instrument is precision-machined. Never drop it or knock it over
-
Always clean the instrument after use.
-
Clean the instrument using a soft dry cloth. Never clean the instrument by any mechanical means such as a wire brush or abrasive paper. This may cause, just like the use of aggressive cleaning agents, permanent damage.
(YouTube) Super PIG III Destructive Paint Inspection Gauge - SP1100
Xem thêm chi tiết về Obsnap Instruments Sdn Bhd
 PRODUCT DESCRIPTION